
Pitching your services to potential clients can be a daunting experience, but having the backing of a solid portfolio site makes things a whole lot easier.
But unless you already have some experience with setting up websites, knowing how to create a freelance portfolio site can be a problem.
I’m going to show you how to get a WordPress portfolio site running in under 30 minutes for less than $5 per month.
Read on and I’ll show you exactly how to get started.
Quick Menu
Quick Guide – Set up Your WordPress Portfolio Site
If you don’t want to read the whole guide below, these are the basic steps to getting started:
- Buy a hosting plan. For most lower-traffic sites, SiteGround hosting should be plenty, otherwise, you could consider something more powerful like a DigitalOcean VPS.
- Buy a domain. You can either buy this with most hosting providers during setup, or purchase it separately with a different provider like Google Domains.
- Install WordPress. This is super simple with most hosts, taking just a few minutes to do.
- Set up WordPress. First, choose a theme – I recommend GeneratePress, but there are thousands of other free and paid themes available.
- Customize and brand your site. From this point onwards, it’s all about how you want to personalize your site with text and images.
For a detailed breakdown of the above steps, read below.
Set Up Your Hosting
If you expect your site to receive heavy traffic I don’t recommend using shared hosting (we use a DigitalOcean VPS for this site), but for a simple portfolio site, it should be plenty. As a bonus, using shared hosting gives you free branded email accounts, which are invaluable when used to represent yourself professionally.
There are a lot of options out there for shared hosting, but I’ve had good experiences with SiteGround in the past and continue to recommend them. But how do you get this started?
This is an optional step but recommended if you want to save a few bucks. Head to Google Domains and buy your domain of choice. I like Google Domains as they include free WHOIS domain privacy as default – meaning that no one will be able to see your personal details if they look up your domain. This often costs extra with other registrars.
If you don’t care about this you can also buy the domain directly from your hosting provider in the next step below, but they will generally be slightly more expensive and lacking this privacy feature (or will charge extra for it).

Set up SiteGround and Install WordPress
1. Go to SiteGround and buy a basic shared WordPress hosting plan. This will set you back $3.99 per month – a small price to pay for a site that should generate plenty more income in the future.
Note that during sign up you’ll be asked where you want your data center to be located. If you’re offering your services primarily in a specific part of the world, try to choose a data center that’s in that country or region.
If you didn’t buy a domain name in the previous step, you can also buy one during this process. If you already have a domain, enter it when prompted.

2. Once your account is set up, go to your main SiteGround account page. You should be shown a banner asking you to Set Up Site, go ahead and click it. If you don’t see the banner, click on Websites at the top, and then select your domain name and click Complete.

3. On the next page, click “Start New Website”. From the options that appear, select WordPress on the left. Finally, enter your new WordPress login credentials. Click continue when you’re done.

4. On the next page you’ll have the option to add extra features, such as a site security scanner and domain privacy (which is included by default at Google Domains, which I recommended earlier).
There are free WordPress plugins you can use to scan your site (WordFence being one of the best), so I recommend you just click finish, unless you bought your domain with SiteGround and want to buy the extra WHOIS protection privacy feature now.

5. Your site is being created! This could take a few minutes.

Set up and Customize Your WordPress Site
- Install a WordPress theme: Themes define the visual layout and design of your site. I highly recommend GeneratePress (free or paid) due to its high speed and flexibility. However, there are thousands of free and premium themes available. To install a theme, go to Appearance > Themes in your WordPress admin panel, and either click “Add New” to search for themes in the WordPress library, or click “Install Themes” and upload the zip file of the theme you’ve chosen.
- Customize your theme: This will involve a few steps, which can vary depending on the theme you chose.
Here’s a general guide: - Read the documentation: Before you start customizing, make sure to read the theme’s documentation (at least the basics!). This will give you an understanding of all the features your theme offers and how to use them. You’ll also get a lot out of the official WordPress documentation, which runs you through the finer details of site editing, no matter which theme you choose.
- Review theme options: After activating your theme, go to Appearance > Theme Options in your WordPress admin panel to explore the customizations your theme offers.
- Start customizing: This might include changing the color scheme, adding a background image, or modifying other visual elements. For example, you might want to change the highlight color, which can be done within the Styling Options of your theme. You might also want to add a tiling background image, which can be done by choosing a background image and setting it to repeat.
- Choose and install essential WordPress plugins: These can add functionality to your website, like SEO tools, contact forms, or social media integration. Be careful not to overload your site with too many plugins, though, as this can slow it down. I can recommend: Yoast SEO (for SEO optimization), All-in-One WP Migration (a backup tool), WP Fastest Cache (for speed optimization), WordFence (for site security), and SeedProd’s Coming Soon page plugin to get started.
- Build your homepage: This is the first page people will see when they visit your website. It should be engaging and give a clear idea of who you are and what you do. You can use a page builder plugin or the built-in Gutenberg editor to design your homepage. WordPress also offers a Block Pattern Directory that provides pre-made layouts you can use.
- Add relevant projects and work samples: These can be added as separate pages or posts, depending on your preference and the structure of your site. Make sure to include images and descriptions of your work.
- Create an ‘About Me’ page: This should provide more information about you, your skills, and your experience. It’s a chance to introduce yourself to your visitors and give a personal touch to your site.
- Build a contact form: This gives people a way to get in touch with you directly from your site. There are many plugins available that make it easy to add a contact form to your site.
- Add more content: This could be blog posts, articles, news updates, or anything else you think would be relevant and interesting to your visitors. Regularly updating your content can help improve your site’s SEO and keep visitors coming back.
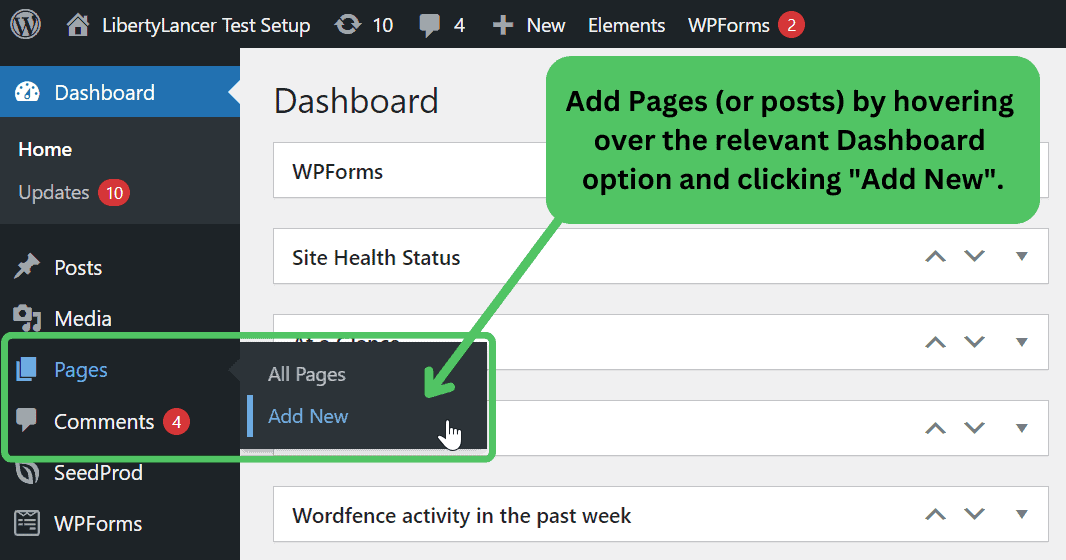
To create and edit new pages or posts, you’ll want to navigate to your WordPress dashboard. From there, you can click on “Pages” or “Posts” in the left sidebar to create a new page or post. You can add content to these pages or posts using the WordPress editor, which allows you to add text, images, and other types of content. You can also format your content using the options in the editor (usually on the right-hand side when you’ve clicked on a block, under the “Block” tab.)
It will no doubt take a little while for you to get used to WordPress, but it’s the simplicity of it that really makes it stand out. While you can create massive websites that scale with it, it’s just as at home with a small-scale portfolio site with just a few pages and images.
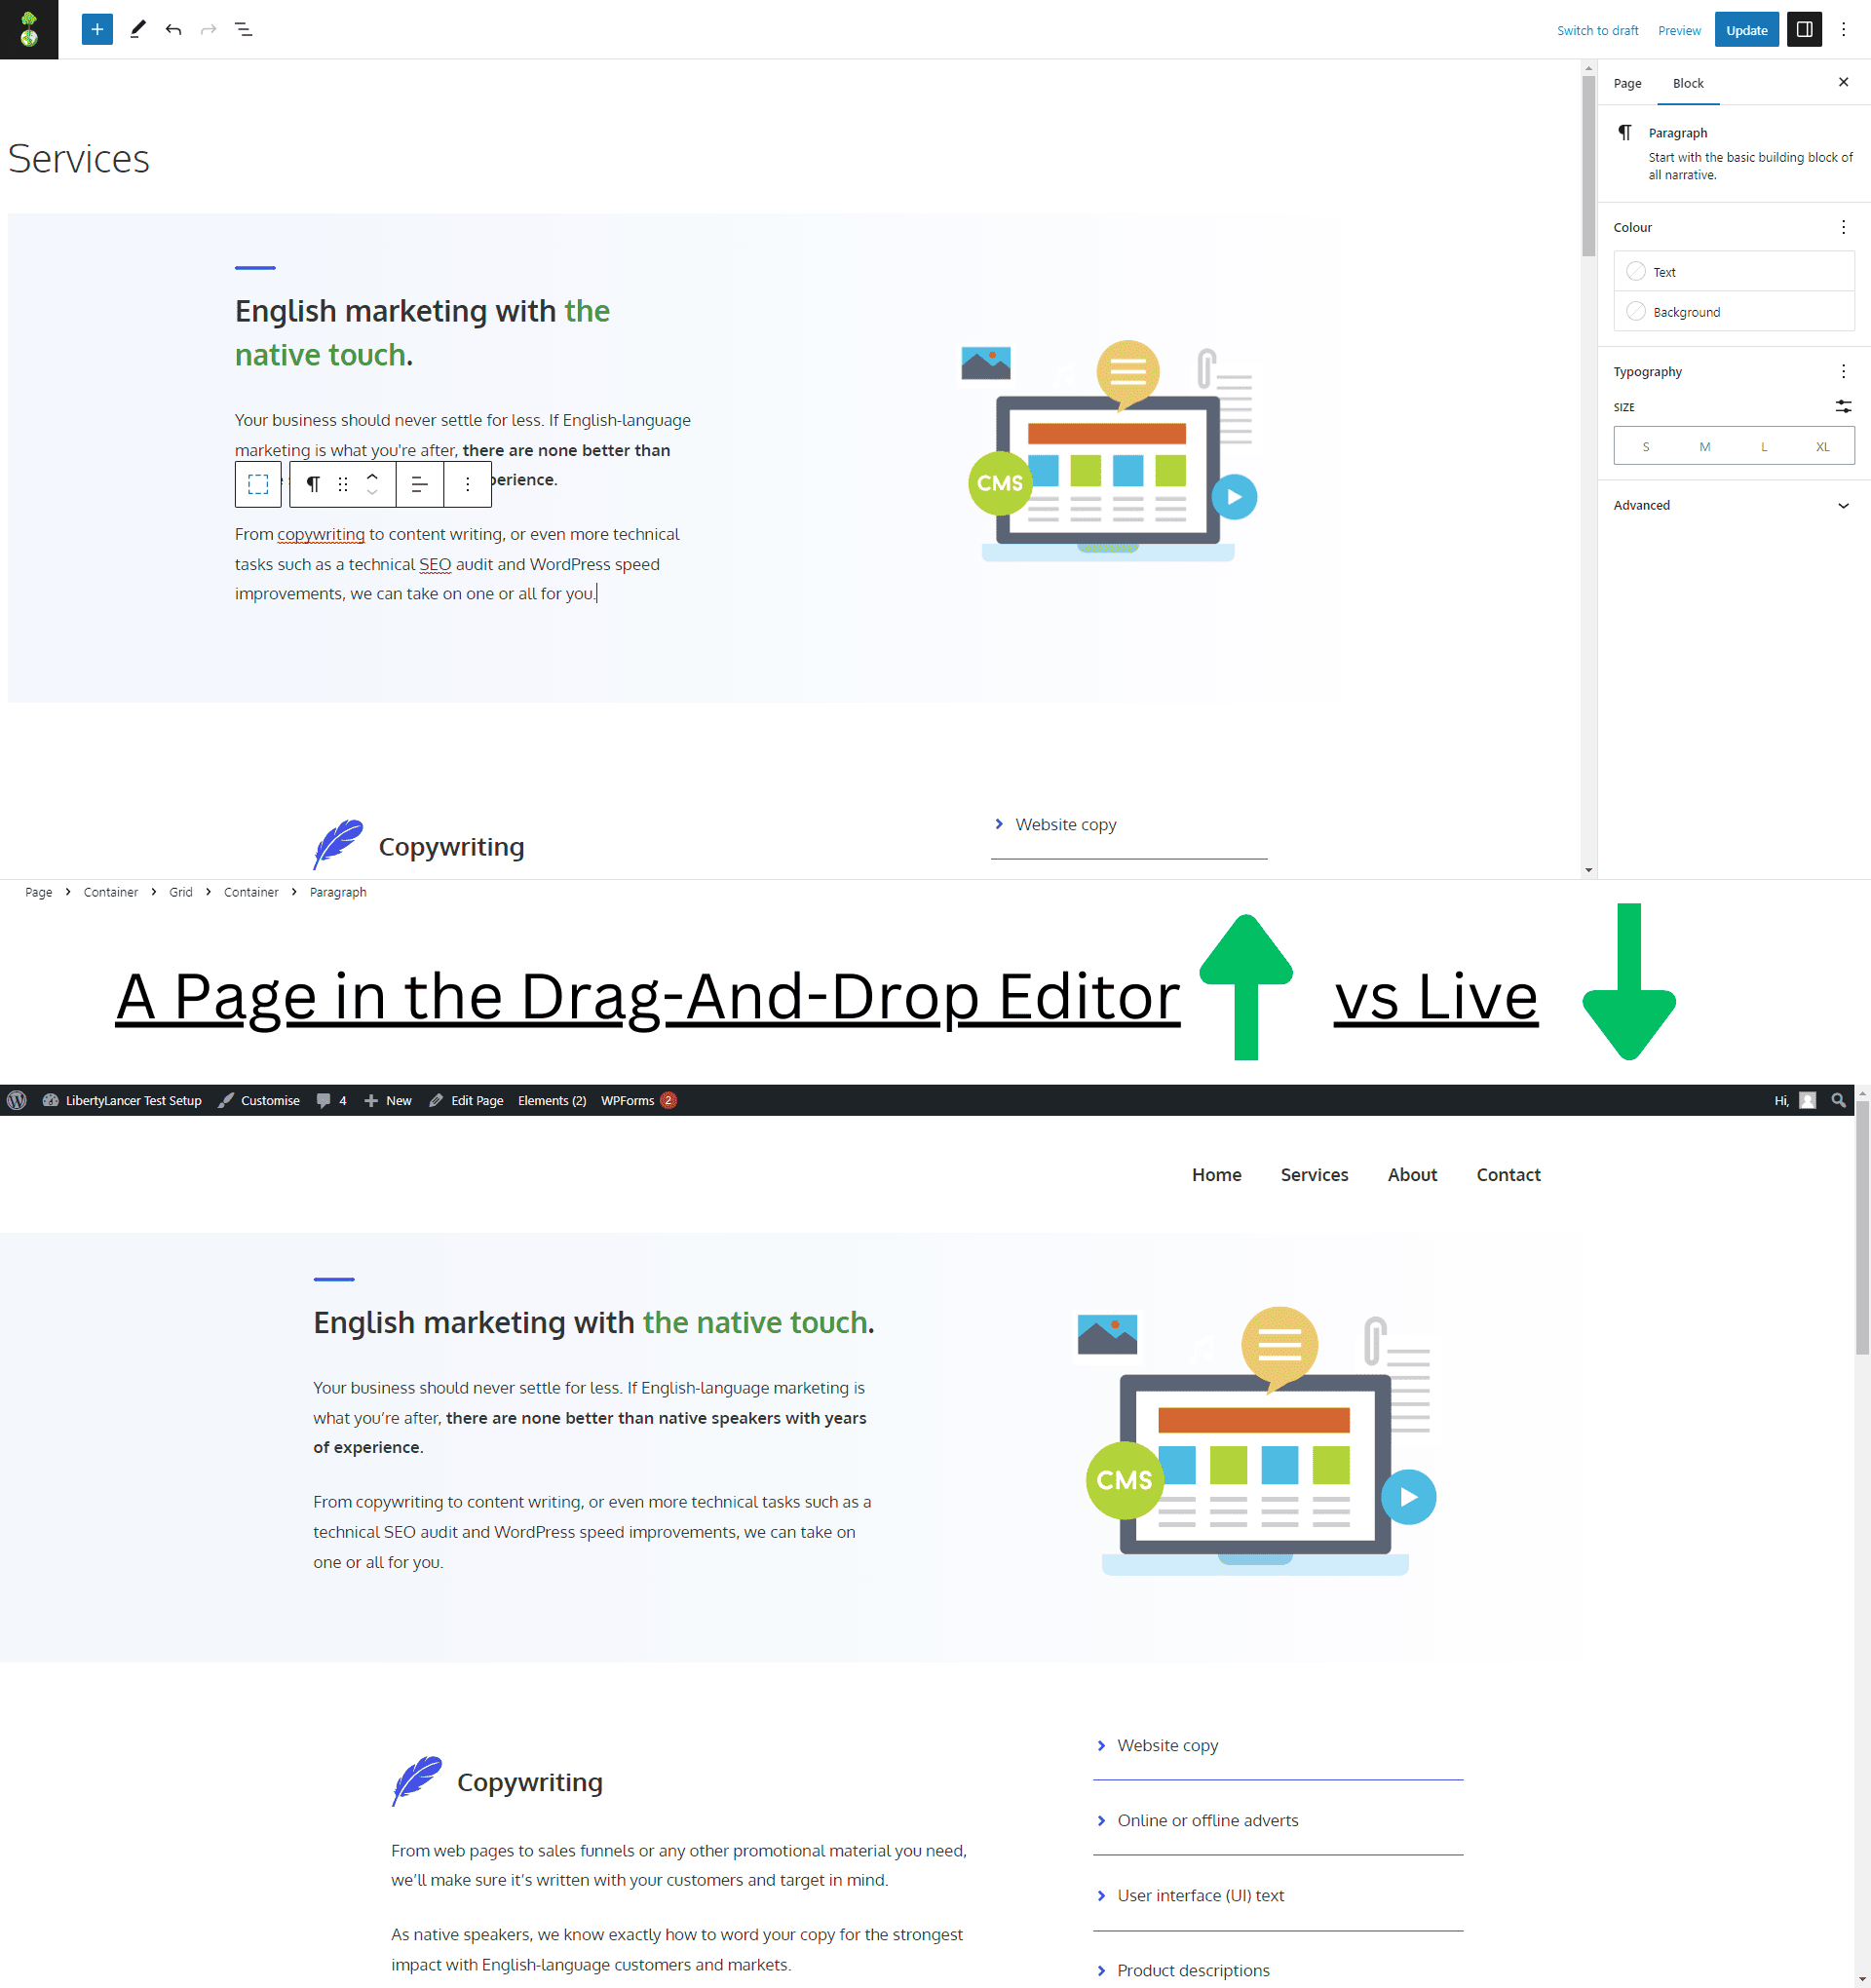
Simply drag-and-drop, tweak colors, margins, fonts, and all manner of things. But best of all, if you choose a good theme to begin with, you shouldn’t have to change much at all – simply replace the relevant text and images and you’re good to go! As you can see below, you should often have a good idea of what a page should look like within the page editor before it even goes live.
FAQ – Build a Freelance Portfolio Website with WordPress
Your domain name should ideally reflect your personal brand. If you’re a freelancer or individual professional, your full name or a variant of it can make a good domain name. If it’s for a business or agency, the business name is usually a good choice. Make sure it’s easy to spell, pronounce, and remember.
Include a variety of work samples that best represent your skills, creativity, and experience. Choose projects that you are proud of and that show your ability to deliver high-quality work. If possible, include work that you have done for recognizable brands or successful projects.
Besides showcasing your best work, consider adding case studies that explain your process, challenges you’ve overcome, and the results of your work. This gives your potential clients insight into how you work and the value you can bring. Also, ensure your site is visually appealing, easy to navigate, and that it clearly communicates who you are and what you do.
Your “About Me” page should include a brief bio that highlights your skills, experience, and what you specialize in. It’s also a good place to show your personality and values. Including a professional photo can also help to make a personal connection with your audience.
It’s a good practice to update your portfolio regularly as you complete new projects. This keeps your portfolio current and allows you to continuously showcase your most recent and best work. How often you update will depend on how frequently you complete projects that you think should be included.
If you’re just starting out and don’t have many projects to showcase, consider including personal projects, school or training projects, or pro bono work. You can also explain your role and what you learned from these experiences. As you gain more professional experience, you can replace these with client projects.
There isn’t a definitive answer as it depends on the individual. However, a good rule of thumb is to showcase a diverse range of your best work. You want enough projects to demonstrate your skills and experience, but not so many that it overwhelms visitors.
Quality is more important than quantity, so it’s better to have a few excellent examples than many mediocre ones. Five to ten projects is often a good range, but this can vary. If you’re just starting out, even one or two well-presented projects can be enough.